Ubuntu and other Linux distributions have proven to be really useful
when Windows stops working. Versatility, portability and speed are among
the many advantages of having a bootable OS in a USB flash drive. These
installations can help fix problems in Windows operating systems, such
as viruses, errors in the registry, etc. They can also act as an
“emergency operating system” when Windows fails, providing an alternate
OS you can boot from to extract your files from the affected computer.
Booting from USB flash drives does have one drawback: older computers
won’t have this capability. Fortunately, it is becoming less common to
find computers that do not support booting from USB. In this tutorial I
show you how to create a bootable Ubuntu USB flash drive from Windows.
To accomplish this, we are going to be using a utility called
Unetbootin.
Instructions
Download the latest Ubuntu distribution (Unetbootin even supports the daily Ubuntu builds)
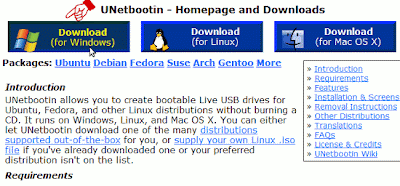
Download Unetbootin; the program does not have an installation as it does not need one; just double click on it and it will start.
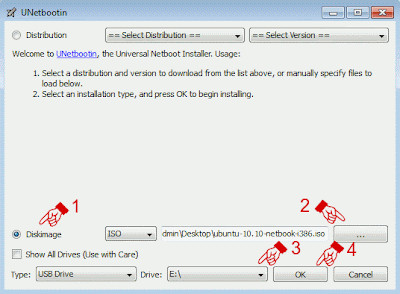
On top of the Unetbootin windows you will see two drop down menus; ignore them if you have already downloaded the ISO. If you do not have the ISO, just select the distribution and the version and Unetbootin will download, and install it for you. The reason I did not focus on this part for the tutorial, is because many of you probably have the ISO downloaded already.
1) Select “Diskimage“.
2) Click the “browse” button and select your ISO image.
3) Make sure your USB destination drive is set to the correct drive letter.
4) Click “OK” to start the process.
Next, Unetbootin will start creating your flash drive. The Ubuntu image is about 700mb, so the process can take a while.
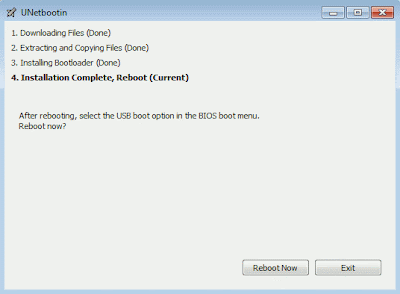
When Unetbootin finishes creating your Ubuntu bootable USB flash drive, it will give you the choice to either “Reboot” or “Exit” the program. Choose reboot if you wish to try your newly created Ubuntu USB flash drive, otherwise choose “Exit”.


 About the Author


0 comments: