-->
You might be looking for a way to try out Ubuntu Linux but don’t like
the idea of creating a partition, using a slow live CD, or don’t have
enough resources to run a virtual machine. Today we take a look at using
the Wubi installer to get Ubuntu running on your computer with very
little effort.
Wubi is an officially supported Ubuntu installer that allows Windows users to easily get started in the Linux realm. Using Wubi to install Ubuntu is a similar process you’d use to install any other software program in Windows. It saves you the hassle of creating another partition or creating a VM. Wubi has been around for a few years now, and official version have been included on the Ubuntu Live CD since 8.04 “Hardy Heron”. We’ll take a look at installing Wubi from the Ubuntu Live CD and also downloading Wubi.exe separately and installing Ubuntu.
Installing Ubuntu with Wubi from Ubuntu CD
In this first method we’ve already downloaded the Ubuntu Live ISO and burned it to CD. In Windows pop in the Ubuntu 9.10 installation disc and run wubi.exe.
Download Wubi Installer
Download Ubuntu 9.10

At the Ubuntu Menu screen click the Install inside Windows button.
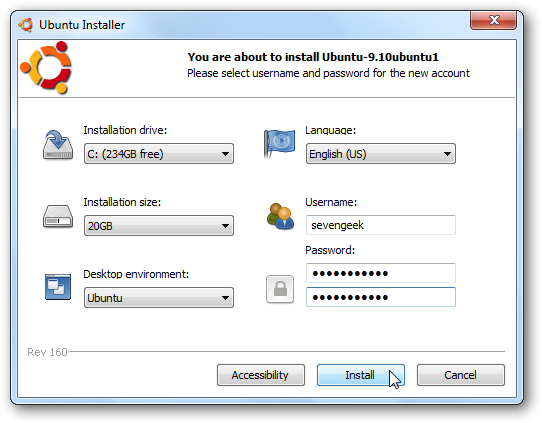
 At the Ubuntu Installer screen you choose the language, install
drive, installation size, username and password then when you’re
finished click Install.
At the Ubuntu Installer screen you choose the language, install
drive, installation size, username and password then when you’re
finished click Install.

Give it a few moments while the installation kicks off…

When it’s complete, a restart is required but you can do it right away or wait until later.

Installing Ubuntu from Wubi.exe
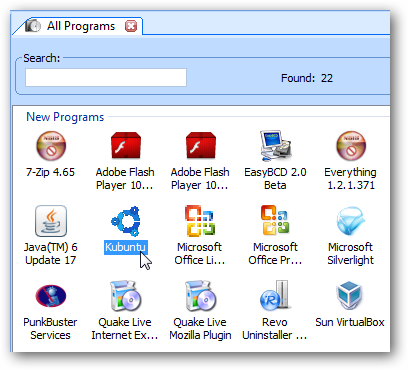
If you don’t already have the Ubuntu CD, another option is to download the Wubi Installer and kick off the install process. This simplifies the process even more because you don’t need to download the ISO and burn it to disc. One thing to point out with this method is you’ll get extra choices for the type of Desktop Environment you wish to install. In this example we’re choosing the Kubuntu environment.

Now when the installation takes place, it will download the appropriate ISO for the chosen desktop environment. Kubuntu uses the KDE environment which is different from the Gnome used in Ubuntu. The main difference is that KDE is more flashy with graphics and might be easier for a Windows user to get comfortable with.

No matter which route you take to install Ubuntu with Wubi, everything is installed to C:\Ubuntu directory.

Booting Into Ubuntu
After the first reboot, you can choose between Windows 7 or Ubuntu at the Windows Boot Manager screen.
 The first time you boot into Ubuntu, wait a few minutes while the
installation finishes up. You’ll see a series of screens and then the
main install screen is displayed showing progress and screens showing
features offered in Ubuntu 10.12
The first time you boot into Ubuntu, wait a few minutes while the
installation finishes up. You’ll see a series of screens and then the
main install screen is displayed showing progress and screens showing
features offered in Ubuntu 10.12
 Your system will reboot one more time and again you will have Windows 7 or Ubuntu to choose from.
 When you select Ubuntu from the bootloader, it will go into the GRUB
bootloader where you can select Ubuntu, Recovery Mode, or back to the
Windows 7 Boot Manager.
When you select Ubuntu from the bootloader, it will go into the GRUB
bootloader where you can select Ubuntu, Recovery Mode, or back to the
Windows 7 Boot Manager.
 At the Ubuntu login screen you’ll notice the username and password will be what you gave it in the steps above.
 That’s really all there is to it…now you can easily boot into Ubuntu and get your geek on with this popular flavor of Linux.

Here is a look at the Kubuntu interface after a bit of tweaking…if you choose that route.

After Ubuntu has been completely installed, you can select the default boot system by going into Advance System Settings \ Startup and Recovery…then selecting between Windows or Ubuntu.

Uninstall Ubuntu
So you’ve tried Ubuntu and decided you don’t like it, so now what do you do? It’s easy…just uninstall it. Boot into Windows 7 and go into Add / Remove Programs…

Or use a utility like Revo Uninstaller.
 The uninstall process is extremely simple as well and consists of two screens. Verify you want to uninstall Ubuntu…
 That’s it! It’s uninstalled and you have your hard drive space back.
When you reboot your system, there’s no leftover funky GRUB or other
bootloader to worry about. Your PC will boot directly into Windows.
That’s it! It’s uninstalled and you have your hard drive space back.
When you reboot your system, there’s no leftover funky GRUB or other
bootloader to worry about. Your PC will boot directly into Windows.

Conclusion
This might be the easiest way for the Linux beginner to get their feet wet with Ubuntu as there are no partitions to create and installation is extremely simple. For this article we used Windows 7 but it should work on Windows 98 through Windows 7 …except for Windows ME…which no one should be running anyway. If you’re looking for an extremely easy way to start using Ubuntu Linux, you’ll definitely want to give the Wubi install a try.
Download Wubi Installer
Download Ubuntu 9.10
in this articles we see :
installing ubuntu on a windows machine
how do i install wubi
how do i start wubi
Wubi is an officially supported Ubuntu installer that allows Windows users to easily get started in the Linux realm. Using Wubi to install Ubuntu is a similar process you’d use to install any other software program in Windows. It saves you the hassle of creating another partition or creating a VM. Wubi has been around for a few years now, and official version have been included on the Ubuntu Live CD since 8.04 “Hardy Heron”. We’ll take a look at installing Wubi from the Ubuntu Live CD and also downloading Wubi.exe separately and installing Ubuntu.
Installing Ubuntu with Wubi from Ubuntu CD
In this first method we’ve already downloaded the Ubuntu Live ISO and burned it to CD. In Windows pop in the Ubuntu 9.10 installation disc and run wubi.exe.
Download Wubi Installer
Download Ubuntu 9.10

At the Ubuntu Menu screen click the Install inside Windows button.

Give it a few moments while the installation kicks off…

When it’s complete, a restart is required but you can do it right away or wait until later.

Installing Ubuntu from Wubi.exe
If you don’t already have the Ubuntu CD, another option is to download the Wubi Installer and kick off the install process. This simplifies the process even more because you don’t need to download the ISO and burn it to disc. One thing to point out with this method is you’ll get extra choices for the type of Desktop Environment you wish to install. In this example we’re choosing the Kubuntu environment.

Now when the installation takes place, it will download the appropriate ISO for the chosen desktop environment. Kubuntu uses the KDE environment which is different from the Gnome used in Ubuntu. The main difference is that KDE is more flashy with graphics and might be easier for a Windows user to get comfortable with.

No matter which route you take to install Ubuntu with Wubi, everything is installed to C:\Ubuntu directory.

Booting Into Ubuntu
After the first reboot, you can choose between Windows 7 or Ubuntu at the Windows Boot Manager screen.


Here is a look at the Kubuntu interface after a bit of tweaking…if you choose that route.

After Ubuntu has been completely installed, you can select the default boot system by going into Advance System Settings \ Startup and Recovery…then selecting between Windows or Ubuntu.

Uninstall Ubuntu
So you’ve tried Ubuntu and decided you don’t like it, so now what do you do? It’s easy…just uninstall it. Boot into Windows 7 and go into Add / Remove Programs…

Or use a utility like Revo Uninstaller.


Conclusion
This might be the easiest way for the Linux beginner to get their feet wet with Ubuntu as there are no partitions to create and installation is extremely simple. For this article we used Windows 7 but it should work on Windows 98 through Windows 7 …except for Windows ME…which no one should be running anyway. If you’re looking for an extremely easy way to start using Ubuntu Linux, you’ll definitely want to give the Wubi install a try.
Download Wubi Installer
Download Ubuntu 9.10
in this articles we see :
installing ubuntu on a windows machine
how do i install wubi
how do i start wubi
No comments
Posted at 1:22 PM | by
Narut0


